Leads Page Tutorial
Verified before your sequence will send to that person.Manage Contacts -> Verify AllThe leads page is probably the most complicated page in the app. Let's go through each feature 1 by 1.
Leads and Contacts are used interchangeably throughout the app.
Navigation and Search

At the top of the page are 3 buttons and one search function.
Search
You can search by:
- first name
- last name
Upload Contacts
Click this button to upload a CSV of contacts. You can use a template to map all of the fields in the format we are expecting.
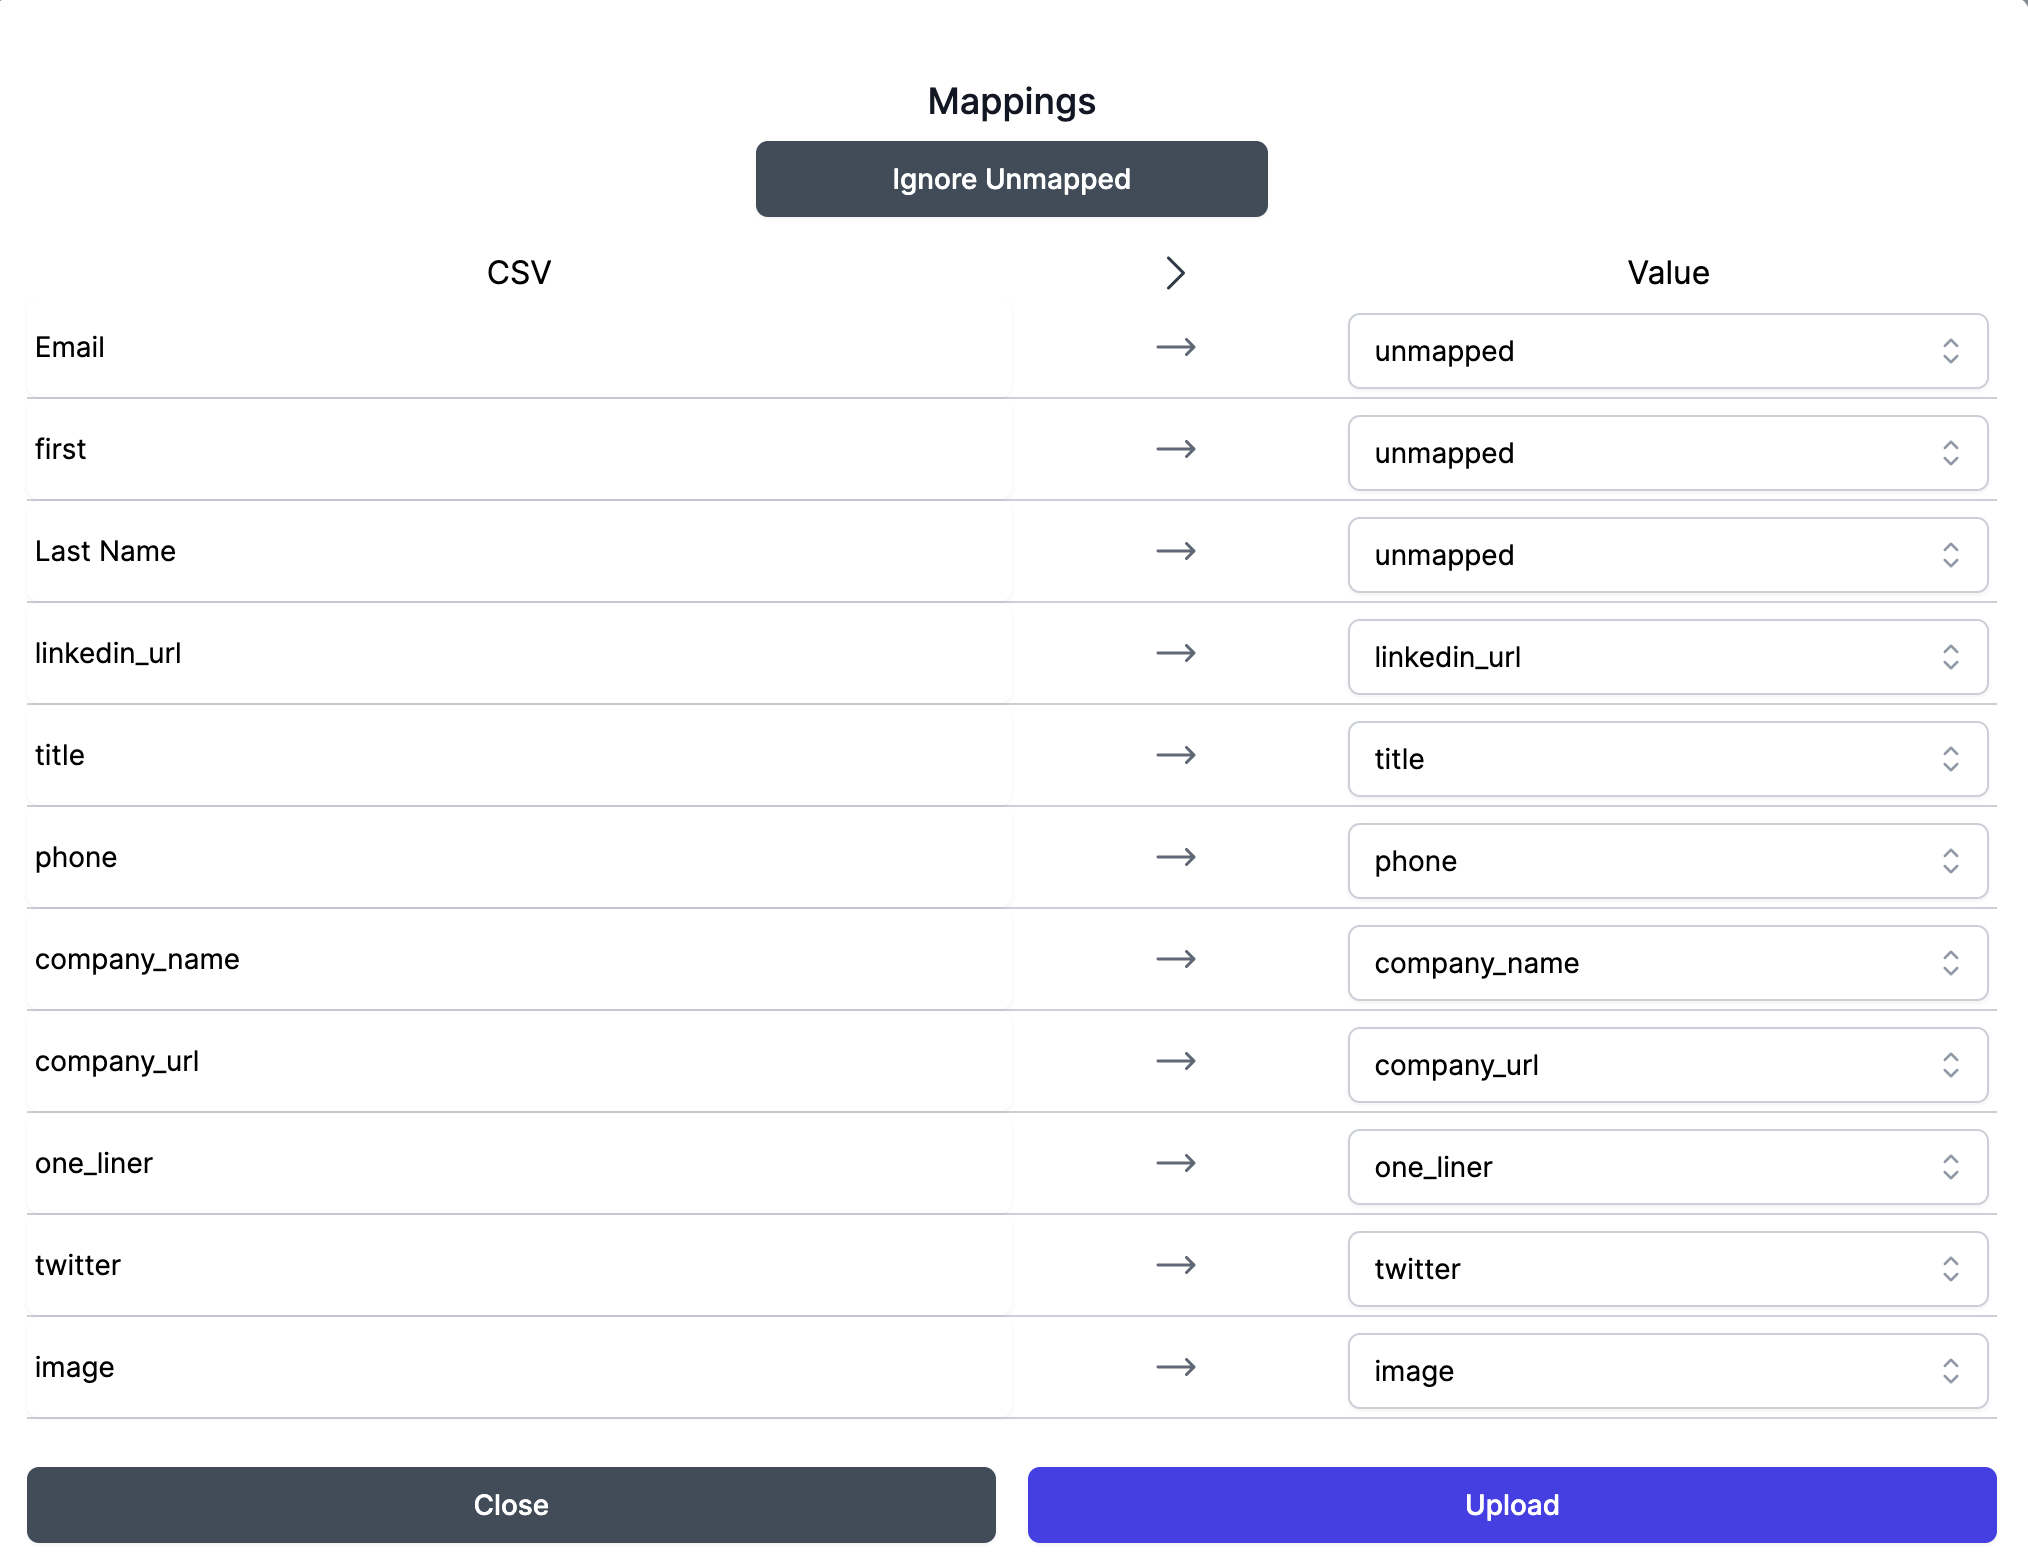
After you upload a CSV, you need to map all the fields you want us to import. If you don't care about a particular field, you can select the unmapped option, or quickly hit the Ignore Unmapped to ignore all unmapped fields. Obviously the email, linkedin, and twitter field are most important.
For linkedin and twitter, we need the fully qualified url of the profile (i.e. https://twitter.com/andrewpierno, and not just @andrewpierno).
Email Validation
all emails are auto validated for free. There are three types of outcomes:
- ✅ - Email is validated
- ❌ - Email failed validation checks
- 🤷 - We're not confident enough to say.
These are just suggestions, you do not have to do anything with this information.
Verified / Finished
Verified - You need to verify the contacts before we send them out. Sometimes the import gets messed up or it doesn't import the fields correctly. You can do bulk verifications by clicking on
Finished - Finished means no more messages will be sent to that user. Leads are auto-finished when they reply to a message. You can force a user to be Finished at any time manually.
Managing Contacts
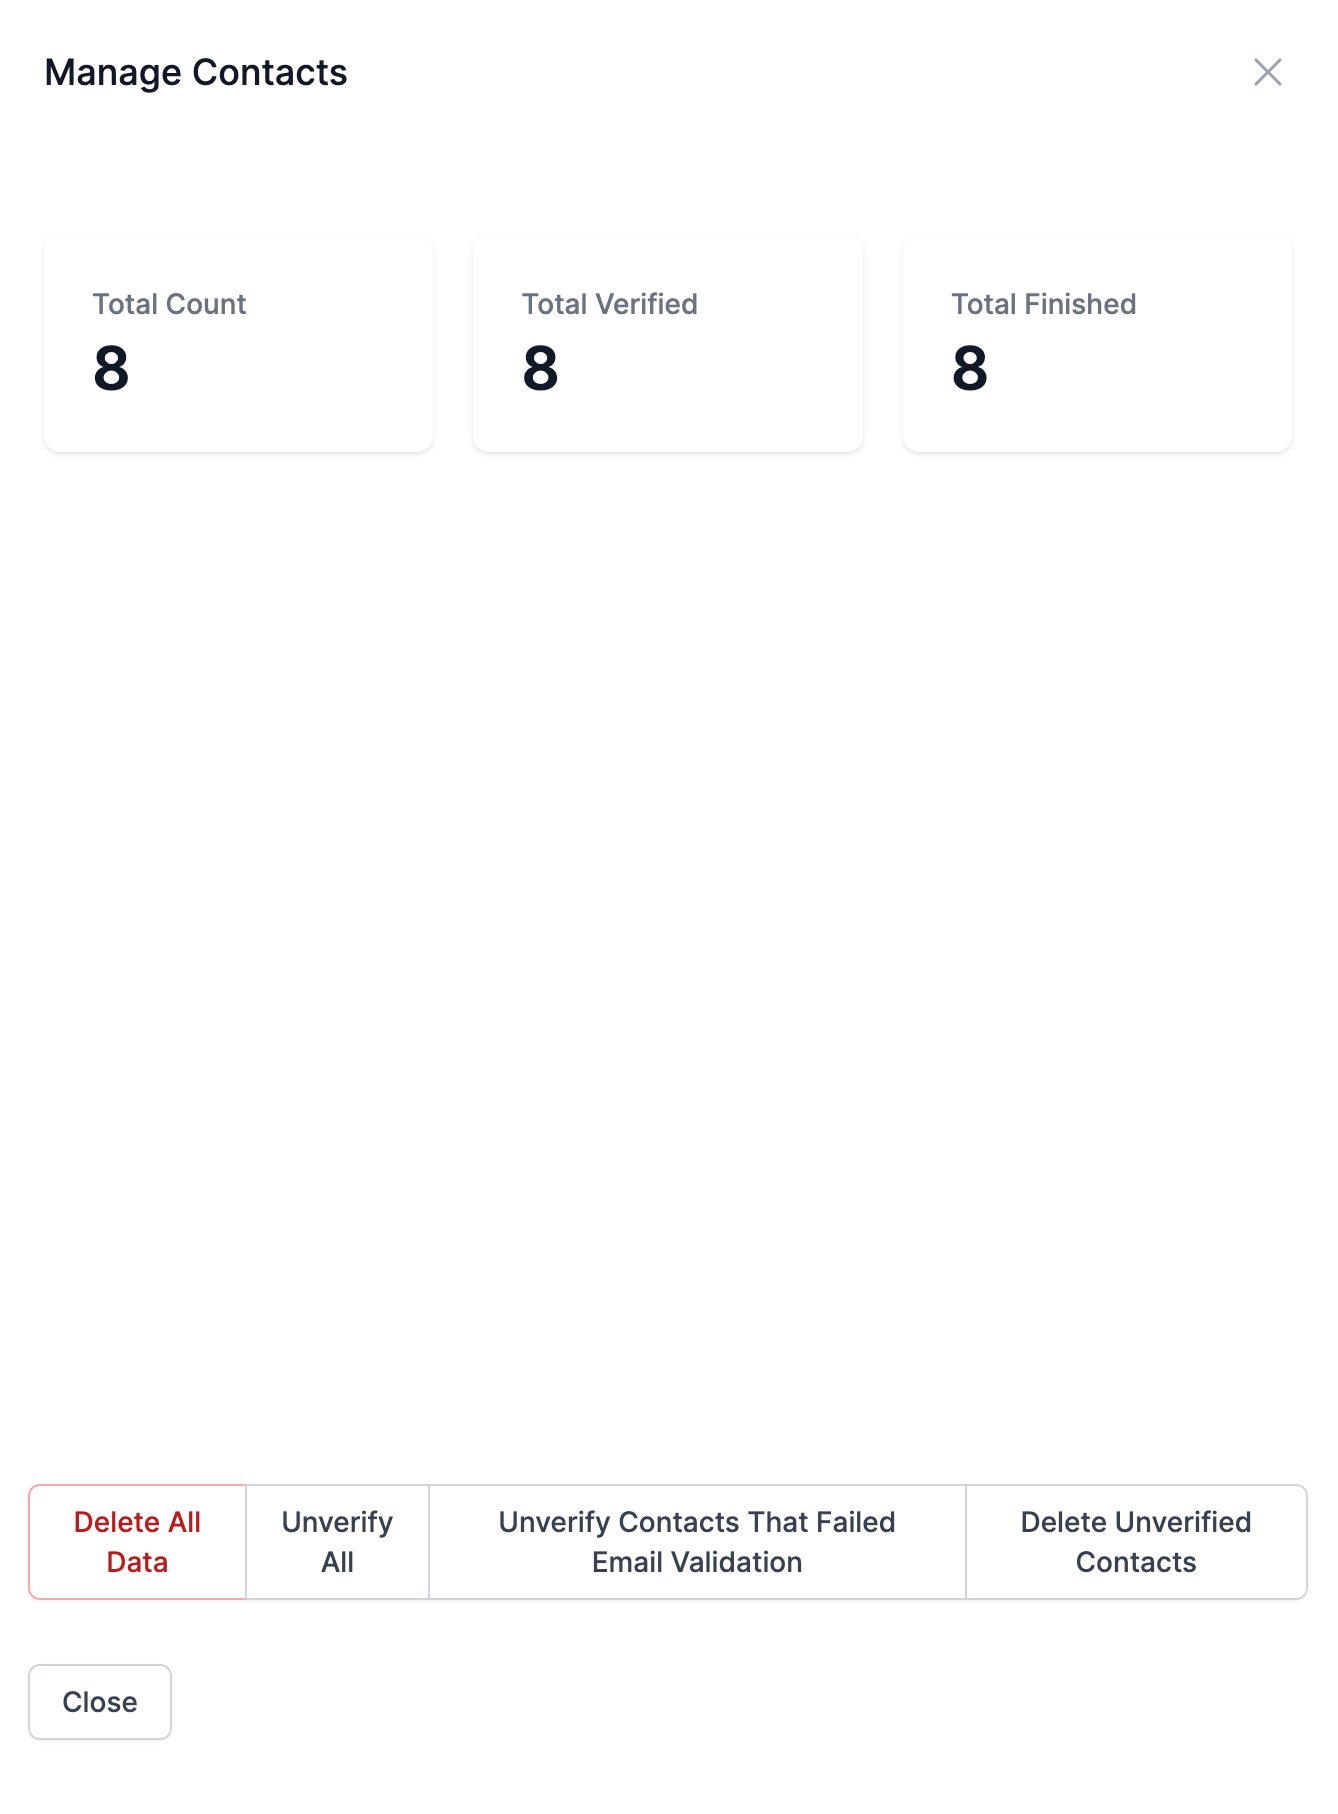
Manage Contacts to view this panelThis panel opens by clicking Manage Contacts. It will let you:
- Delete all your contacts
- Verify or Unverify all leads
- Unverify emails that failed validation (so they are not sent to)
- Delete unverified contacts.
Lead Info
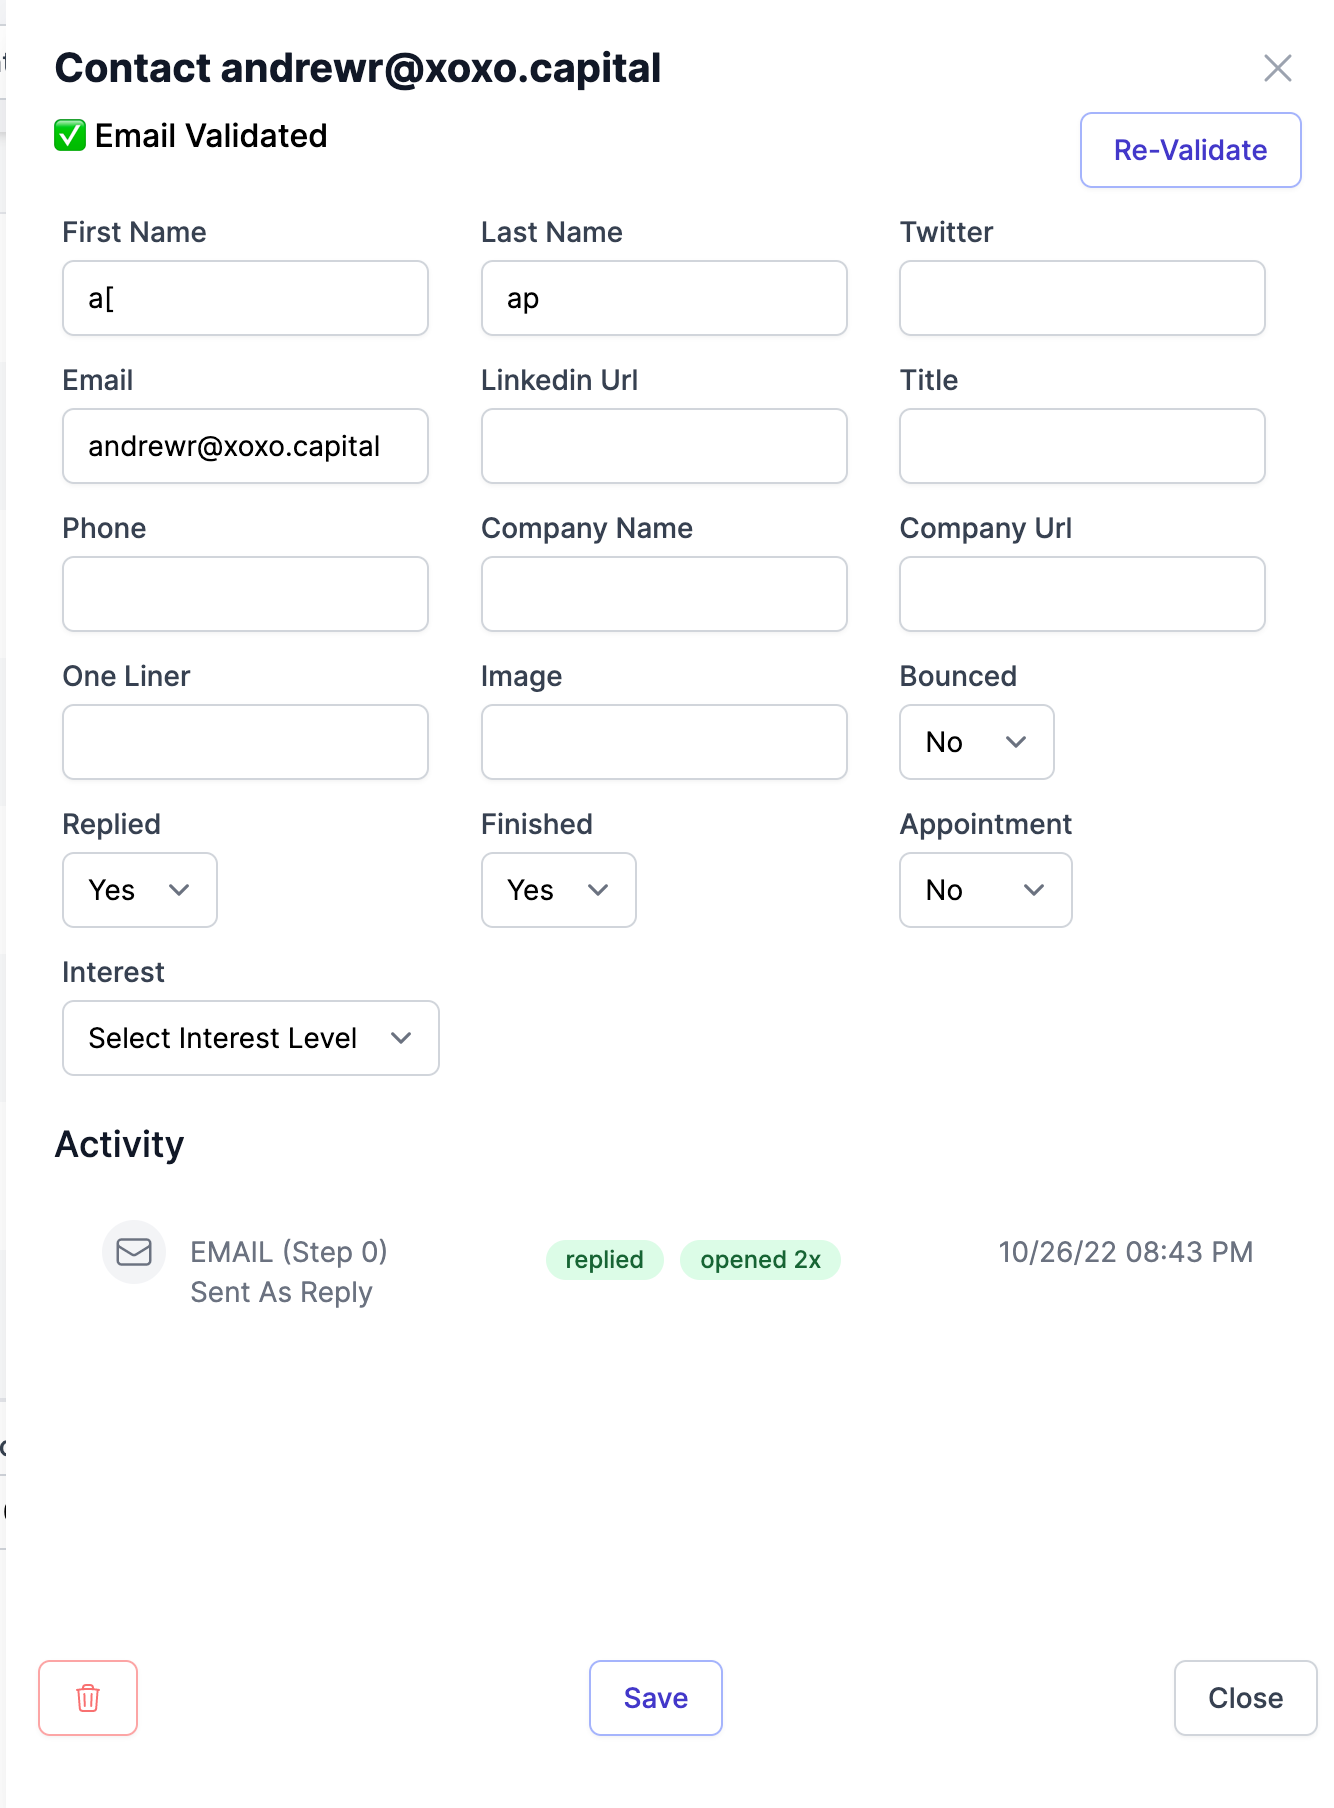
If you click on the information icon on a lead in the table, it will pop open the info we have on that lead including any activity from that lead. You can also delete the lead from here.
Custom Attributes / Variables
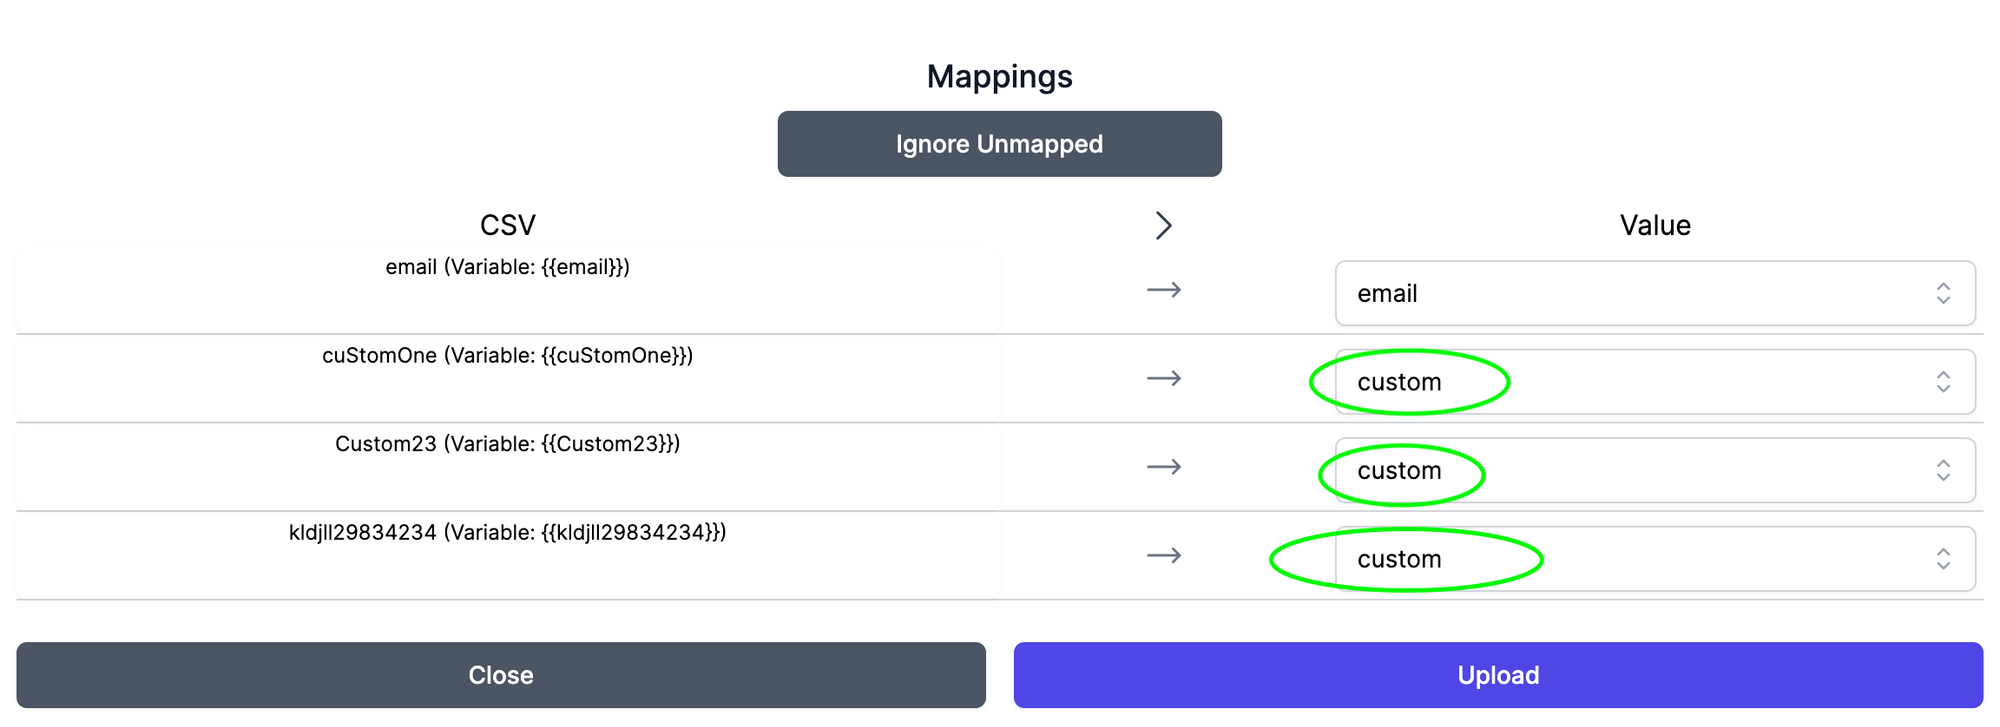
When you upload a new list, you can create custom variables. Simply assign the column as custom and it will be saved exactly (case sensitive) like it is in your spreadsheet column. You can then use the variable like {{yourVariable}} in your sequences. No spaces or special characters are allowed.
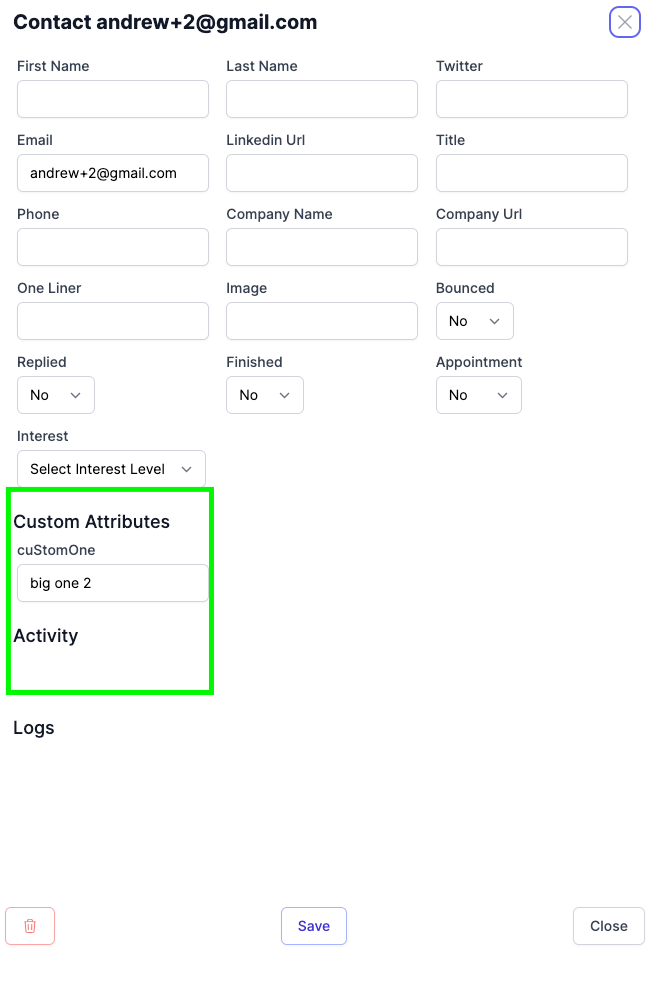
The custom values will also show up in the leads form, as well as in the Custom Attributes section when you click on a Lead on the Leads page.
When you upload a list, you want to select the custom value for the mappings.
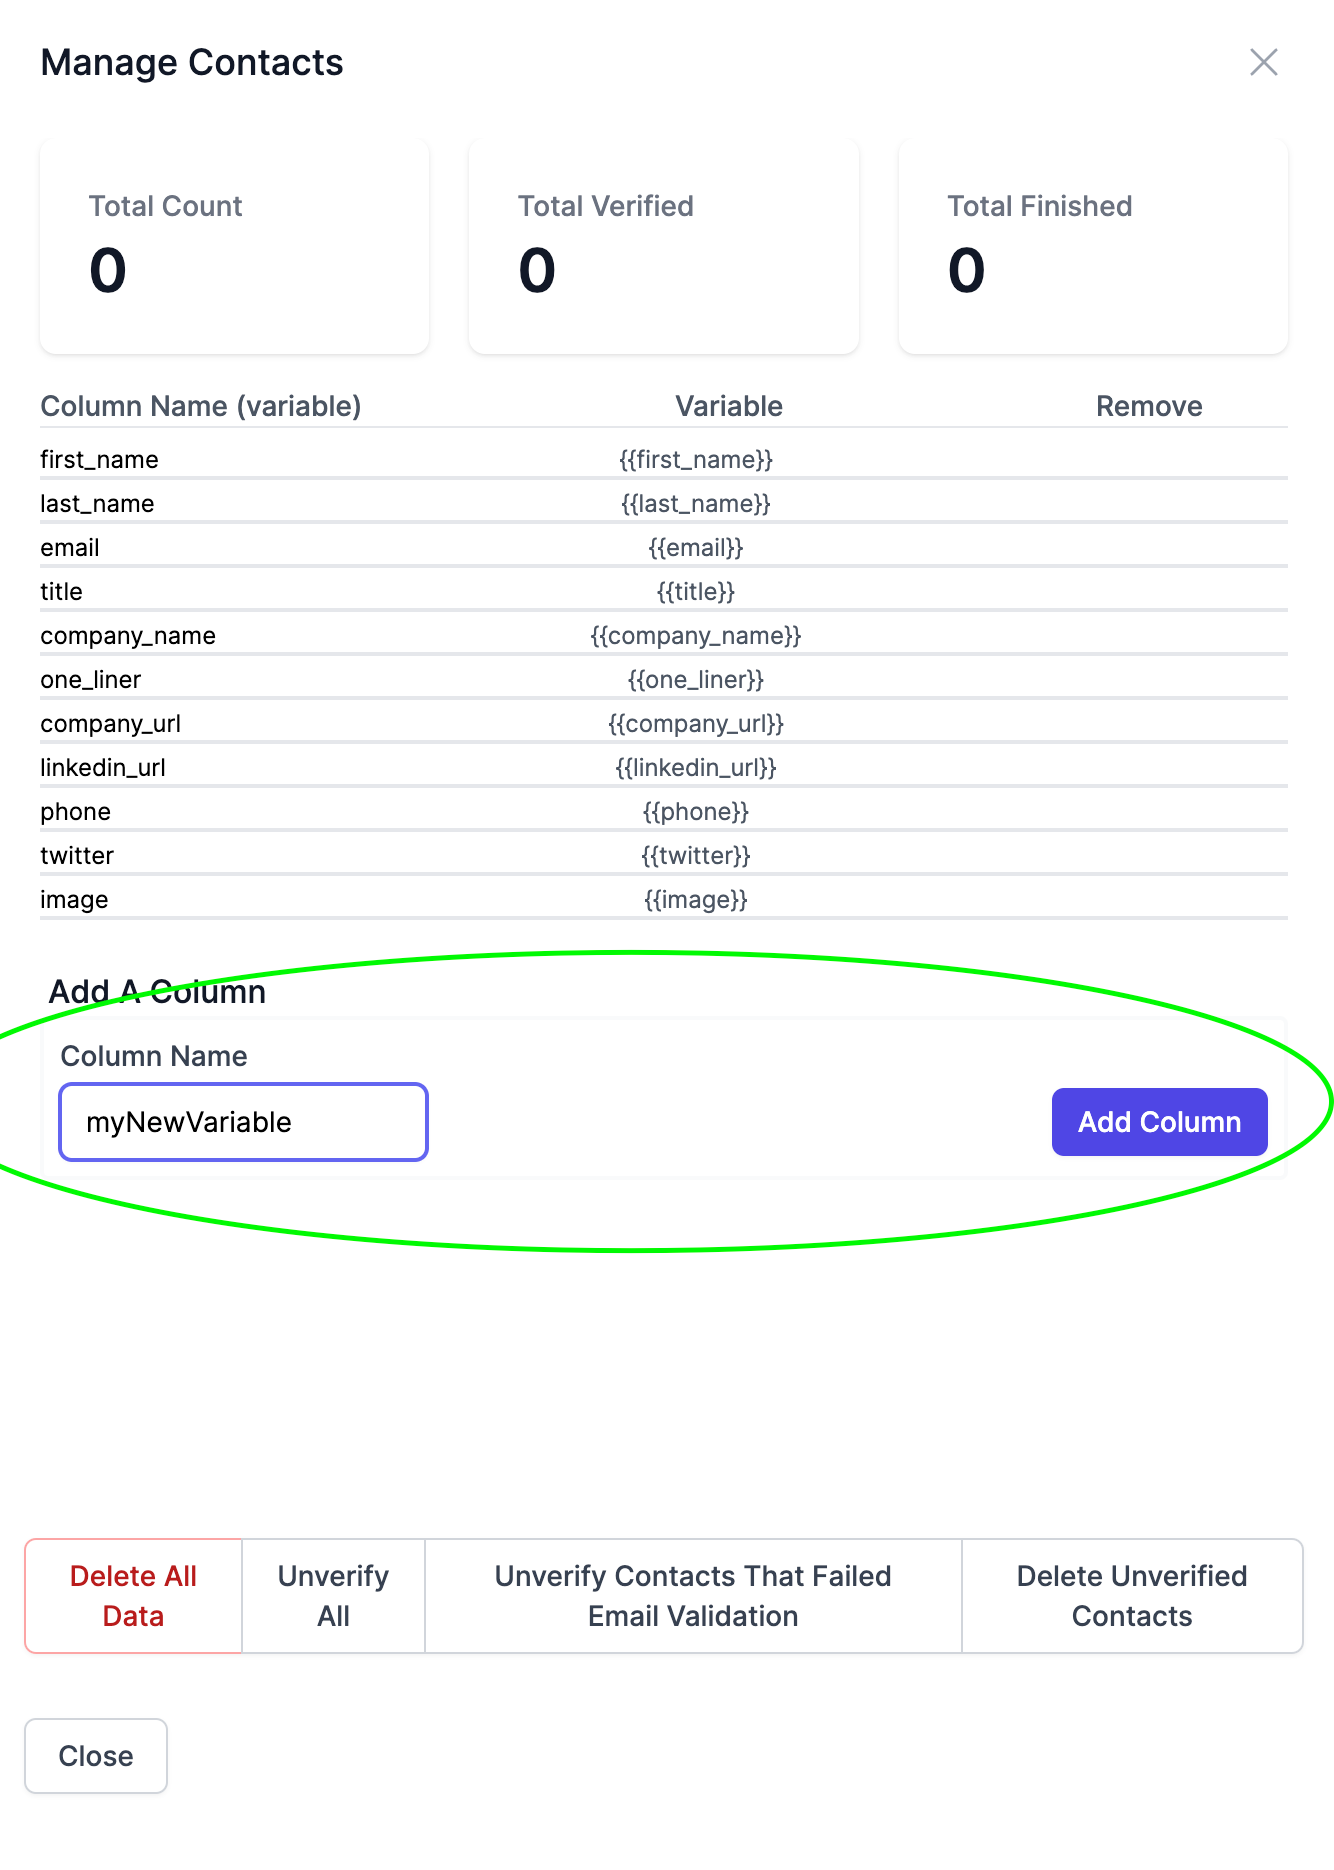
You may also create custom variables in a more ad-hoc manner by clicking on Manage Contacts. Then you can add a column and it will tell you what your new variable. No spaces or special characters are allowed.
When you click on the info icon on the Leads list, you can see which custom attributes a user has.
It's always a good idea to make sure these values look good before validating a contact!
We support both regular urls like:
https://www.linkedin.com/in/andrew-pierno/
and we support linkedin sales nav urls:
we also support recruiter sales nav urls
you can also remove the name search like (for both recruiter and sales nav urls):
https://www.linkedin.com/recruiter/profile/ACwAACqjbsABMPPzDtzrAQTpxoRj_UCijCAi_Po
- you can upload handles like
@andrewpiernoor justandrewpiernoor https://twitter.com/AndrewPierno ... Super Send will figure it out :)
Opt out / Exclude Users from your campaign
- Both
finishedleads and leads that are notverifiedare not sent any messages. In the case of finished, that is typically because they have completed the sequence however you can use either of these settings to prevent users from being sent to. - You can upload a list of leads, mark them as
finished - You can upload a list of leads, and keep them unverified.
- In your Campaign Settings, you can

