How to Set up Your Email for Cold Outreach [Technical Guide]

![How to Set up Your Email for Cold Outreach [Technical Guide]](/content/images/size/w2000/2023/04/wrannaman_image_for_blog_post_titled_How_to_Set_up_Your_Email_f_7ff11b2f-5405-4013-b83e-d29e507a9091.png)
So, you’ve finally decided to invest in cold email outreach for lead generation. Now comes the real challenge—setting up your email address!
You need a whole lot of effort to ensure your emails land in your recipients’ inboxes and email service providers approve of your content and give your domain the green light.
To make things easy for you, I’ve compiled this guide to walk you through the complete steps to set up your email for cold outreach, including:
- Setting up multiple email addresses
- Setting up DMARC, DKIM, and SPF
- Warming up your inbox
And more! Are you ready for it? Let’s dive in!
Setting up Multiple Email Addresses with Google Workspace
Here are the steps to create an email address in Google Workspace for a domain:
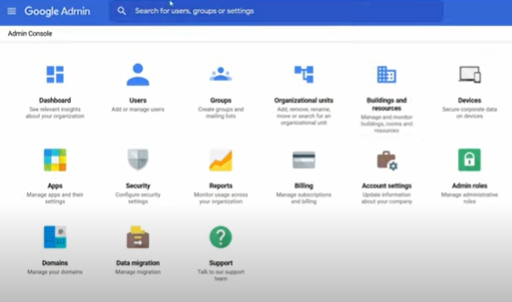
- Sign in to your Google Workspace account.
- Click on the "Admin" icon.
- Under "Setup," click "Add a user."
- Enter the user's information, including the desired email address, first and last name, and password.
- Click "Create."
Once you've created the user, you can add email aliases pointing to your domain. This is useful if you have multiple employees who need their own email addresses and access to Google Workspace tools.
Pro tip: having multiple inboxes for cold outreach is always a good idea. You’ll be able to increase your sending volume and scale your sales. Plus, with unified inbox and inbox rotation features packed into Super Send, you won’t even have to switch tabs.
You can configure the email account settings by following these steps:
- Click on the user's name in the list of users.
- Click on the "Account" tab.
- Under "Email addresses," click "Add an email alias."
- Enter the desired email alias (e.g., info@yourdomain.com), and click "Save."
That's it! You can now access your new email address in Google Workspace by logging in with the username and password you created.
Should You Use a Separate Domain for Cold Outreach?
Using a separate domain for sending cold emails improves email deliverability and protects your main domain's reputation.
If you use your primary domain for cold emailing, there's a risk that your emails could get flagged as spam, which can hurt your email deliverability overall.
By using a separate domain, you can keep your cold email campaigns separate from your regular email activity, which ensures that your emails get delivered to your recipients' inboxes.
Additionally, using a separate domain can make it easier to track the results of your cold email campaigns and make adjustments as needed.
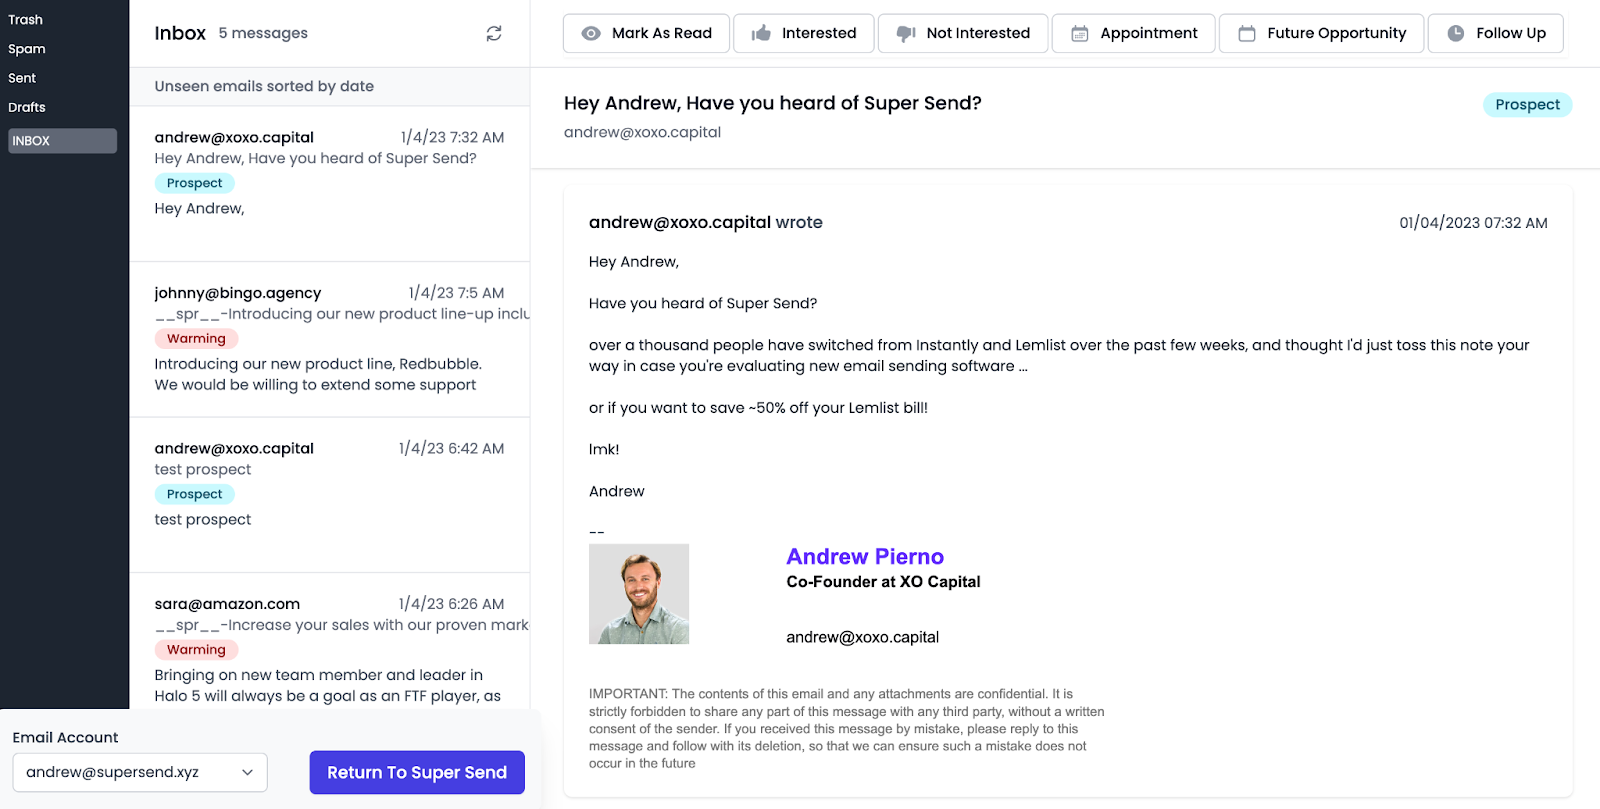
Unified inboxes for cold outreach are a breeze with Super Send!
How to Set up DMARC, DKIM, and SPF for Cold Outreach
DMARC, DKIM, and SPF are authentication protocols that prevent spammers from sending emails from your domain and spoiling your reputation. It’s going to get a little technical from here, but it’s only a one-time process. Follow everything step by step, and you’re golden!
First, let me break down the meaning of each of these terms:
SPF (Sender Policy Framework) specifies which email servers are authorized to send emails on behalf of a particular domain. It publishes a list of authorized email servers in the domain's DNS records. When an email message is received, the recipient checks the SPF record to ensure that the email message was sent from an authorized email server.
DKIM (DomainKeys Identified Mail) adds a digital signature to the email message header. The receiving email server verifies this signature to ensure the message hasn't been tampered with and that an authorized sender sent it.
DMARC (Domain-based Message Authentication, Reporting, and Conformance) enables domain owners to specify how email receivers should handle email messages that fail SPF and/or DKIM checks and provides feedback on email deliverability to domain owners through reports.
Let me walk you through how these authentication protocols work together to authenticate an email:
- Your email server (e.g., Gmail or Outlook) sends the email to the recipient's email server.
- The recipient's email server receives the email and checks the "envelope" (the SMTP MAIL FROM command) to see if it matches the authorized IP addresses from your DNS record. If it does match, the email passes the SPF check and moves on to the next step.
- The recipient's email server then checks the email header to see if it contains a valid DKIM signature. If it is, it passes the DKIM check.
- If both the SPF and DKIM checks pass, the email is considered authenticated. However, DMARC provides an additional layer of authentication by allowing domain owners to specify how email receivers should handle emails that fail SPF and/or DKIM checks.
Step-by-Step Process to Set up SPF, DKIM, and DMARC for Your Email Domain
Set Up SPF
Step 1: Log in to your domain registrar account and locate your DNS settings.
Step 2: Add a new TXT record to your DNS settings, with the name field set to "@." The "@" symbol represents the root domain.
Step 3: In the value field, enter your SPF record. Your SPF record will specify which email servers are authorized to send emails on behalf of your domain.
Here's an example SPF record:
v=spf1 include:_spf.google.com ~all
This SPF record allows email servers listed in the Google SPF record to send emails on behalf of your domain.
Step 4: Save your changes to your DNS settings.
Set up DKIM
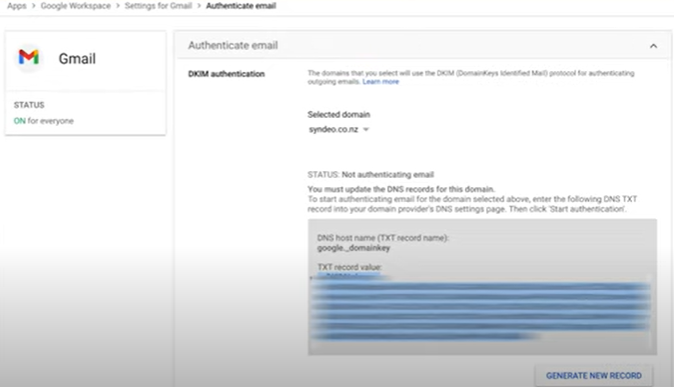
Step 1: Go to your Google Workspace admin account and navigate to “Gmail.”
Step 2: Click “Authenticate email,” and under the DKIM field, click “Generate new record.”
Step 3: Once you’ve generated the new record, copy the record name and create a new TXT record in your DNS setting in your domain registrar account.
Step 4: Navigate back to Google Workspace, copy the “TXT record value,” and paste the entire thing under the “value” field in your DNS setting.
Step 5: Save the new TXT record in your DNS setting.
Step 6: Return to your Google Workspace and click “Start authentication.”
Set Up DMARC
Step 1: Add a new TXT record to your DNS settings, with the name field set to "_dmarc."
Step 2: In the value field, enter your DMARC policy. Your DMARC policy will specify how email receivers should handle email messages that fail DMARC checks.
Here's an example of DMARC policy:
v=DMARC1; p=none; rua=mailto:dmarc@example.com; ruf=mailto:dmarc@example.com; fo=1
This DMARC policy specifies that email receivers should take no action on email messages that fail DMARC checks but should send aggregate reports and forensic reports to the email address "dmarc@example.com."
Step 3: Save your changes to your DNS settings.
Once you've set up SPF, DKIM, and DMARC for your email domain, you'll need to wait for the DNS changes to propagate, which can take up to 48 hours.
Afterward, you can use a DMARC analyzer tool to monitor your DMARC reports and ensure your email authentication is working properly.
List Building and Email Validation
Now that the technical part is over, here comes the fun part—finding your target leads on multiple channels and acquiring their email addresses.
There are many approaches to lead generation, including:
- Using LinkedIn's search function to find people in your target industry or niche, and then a tool like Hunter.io or Findymail to find their email addresses. If you use Sales Navigator, Super Send will automatically find the leads’ email addresses.
- Attending industry conferences and events to network and find potential leads.
- Using Reddit to find potential leads by searching for subreddits related to your industry or niche. You can then engage with members of those communities and reach out to them directly.
- Creating a free resource, such as an ebook, whitepaper, or checklist, can be a great way to attract potential leads to your website. You can then collect email addresses from those who download your resource.
Once you’ve collected the emails of your leads, it’s essential to verify if they’re legit. You can find and validate emails using email finders such as Findymail, Hunter.io, Super Send (which integrates with Sales Navigator and tracks down emails), etc.
Email Warmup
You might feel like starting the email outreach process and hitting send to your hundreds or thousands of leads. However, it’ll be terrible for your email reputation and might get you blocklisted by email service providers.
Email providers like Gmail, Yahoo, and Outlook constantly monitor email activity to detect spam and fraudulent emails. If an email account sends a sudden surge of emails, it can trigger spam filters, leading to poor email deliverability or even account suspension.
The solution is to warm up your email account and prep it over time. Warming up means gradually increasing the volume of emails you send over time to establish a positive reputation with email providers.
Best Practices to Warm up Your Email Account
- Start slow: By slow, we mean sending as few as 10 emails daily. Gradually increase the sending limit by 5-10 emails daily. (Or use Super Send, which automatically warms up your inboxes with best practices in mind.)
- Target engaged contacts: Focus on sending emails to your most engaged and trusted contacts first, such as your subscribers or customers. This helps ensure that your emails are more likely to be opened and engaged with, which shows email providers that you’re a real account.
- Create high-quality content: Create high-quality, personalized content relevant to your target audience. This can improve your engagement rates and help establish a positive email reputation.
- Monitor your metrics: Keep a close eye on your email engagement, bounce, and spam complaint rates. This allows you to identify any issues early on and adjust your email-sending strategy accordingly.
Using Cold Outreach Tools for Building Automated Sequences
While you can very well do cold email outreach by yourself or hire a professional to do it, investing in a cold outreach tool like Super Send saves both time and money:
- Automate the bulk-email-sending process if you have an extensive email list.
- Cold outreach tools can help you to personalize your emails at scale, allowing you to insert different message variables.
- Following up with leads is easily automated at different levels.
- The analytics help you track metrics like open rates, click-through rates, and conversion rates, which can help you to optimize your campaigns over time.
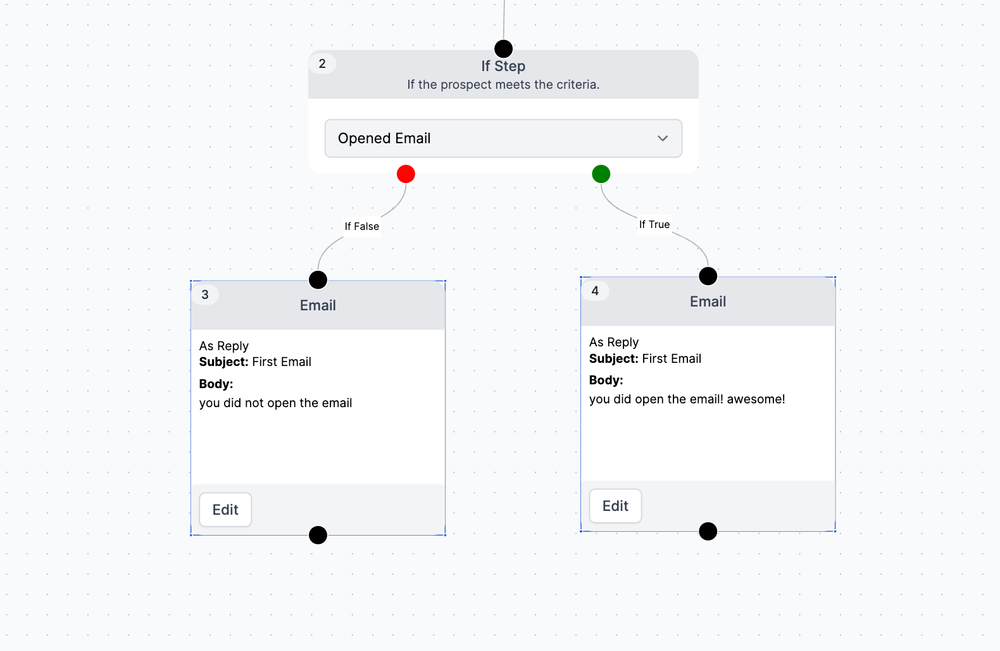
Super Send is a versatile cold outreach tool that helps with email warmup, sequence building, and performance analysis of your campaigns. Plus, you can find and enrich leads with this multi-channel cold outreach tool!
Best Practices for Email Deliverability
The deliverability of your cold emails depends on various factors:
- Your domain’s reputation
- The content of your email
- The quality of your leads
- The frequency of your emails
Here are a few things you can plan to get high returns from cold emailing:
- Keep your email list clean: Regularly clean your email list to remove inactive or bounced email addresses. This will improve your sender reputation and increase email deliverability.
- Avoid spam trigger words: Using words commonly associated with spam can trigger email filters and reduce your deliverability. Avoid words like "free," "discount," "limited time," and "act now."
- Avoid sending attachments: Sending attachments can trigger spam filters and reduce your deliverability. Instead, use links to hosted content or include the content directly in the email body.
- Respect email regulations: Comply with email regulations such as CAN-SPAM and GDPR. This includes providing an easy way for recipients to unsubscribe from your emails and respecting their privacy rights.
- Segment your email list: Segmentation allows you to send targeted emails to specific groups of subscribers based on their interests, behaviors, or demographics. This can help to improve engagement and prevent your emails from being marked as spam.
- Test and optimize your emails: Experiment with different subject lines, email copy, and calls to action to see what works best.
Prepare Your Email for Cold Outreach Success
Setting up a brand new email account might seem like a lot of work, but it’s only a one-time effort. If you do these first few steps right, you’ll see fantastic results from your campaigns!
Follow the guidelines I shared with you and use the right tools, and you'll be able to get your message in front of the right people in no time!
Happy Sending!